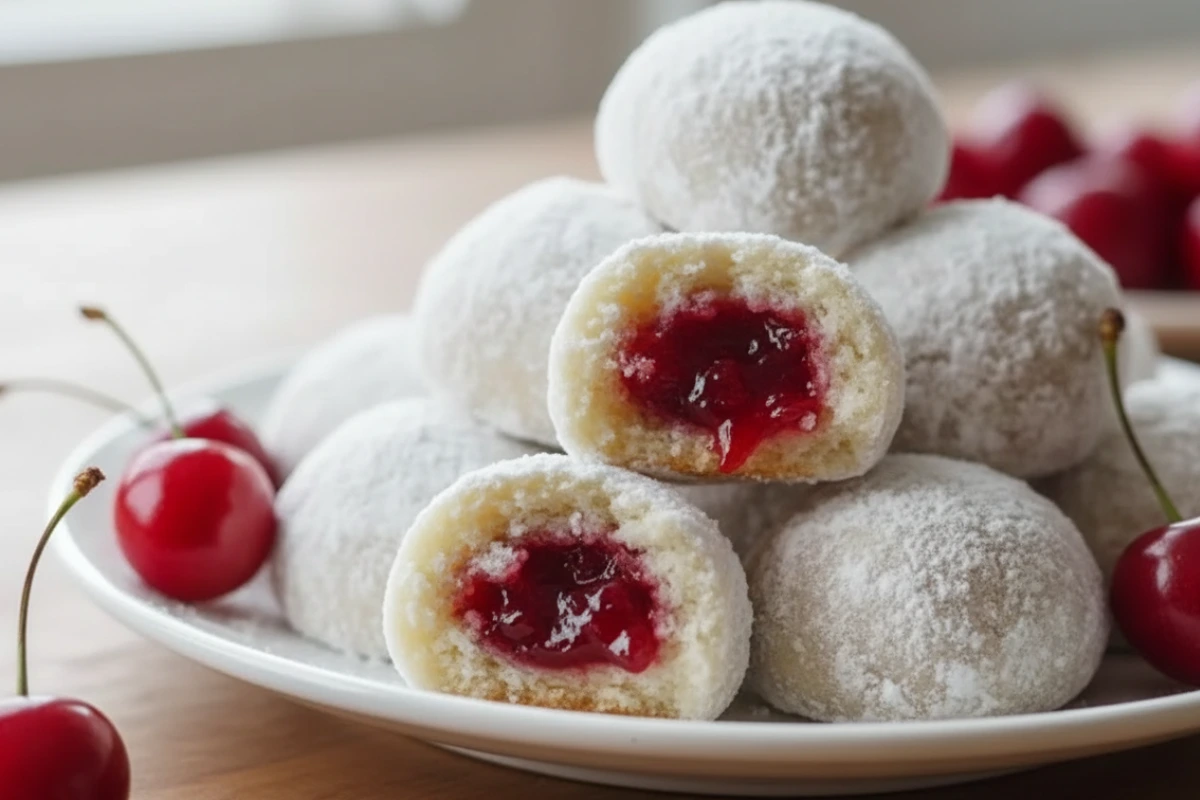
Introduction: Why You’ll Love These Cherry Snowball Cookies
There’s truly nothing quite like the magic of baking, watching simple ingredients transform into something wonderful. These Cherry Snowball Cookies are a perfect example, bringing a delightful twist to a beloved classic. They add a beautiful burst of color and amazing flavor to any table, making them a standout treat.
I’ve always been drawn to desserts that surprise and delight, and these cookies do exactly that! Imagine a tender, melt-in-your-mouth cookie, perfectly crumbly, with a hidden center of sweet-tart cherry. It’s a flavor combination that’s simply irresistible and makes you smile with every single bite. They prove that simple baking can lead to unforgettable joy.
These beautiful Cherry Snowball Cookies are absolutely perfect for so many occasions. Think festive holiday cookie platters, cheerful family gatherings, or as thoughtful homemade gifts that truly show you care. They’re also a wonderful pick-me-up on a cozy afternoon, brightening any day with their charm and deliciousness. If you love delightful treats that bring cheer, you might also enjoy our recipe for Brown Sugar Sugar Cookies.
Table of Contents
Table of Contents
What You’ll Need: Ingredients for Amazing Cherry Snowball Cookies
Gathering your ingredients is the first step to baking bliss! Here’s everything you’ll need to create these truly delicious Cherry Snowball Cookies. Each item plays a key role in their melt-in-your-mouth texture and delightful flavor.
For the Dough
- 1 cup (2 sticks) Unsalted Butter, softened: This is super important for a rich, tender cookie that melts beautifully. If you’re using salted butter, just cut back on the extra salt a little.
- ¾ cup Powdered Sugar: This fine sugar helps create that delicate sweetness and crumbly texture we love in our cookie base.
- 1 teaspoon Pure Vanilla Extract: A must-have! Vanilla truly makes the cherry flavor pop in these Cherry Snowball Cookies.
- 2 cups All-Purpose Flour: This forms the backbone of our dough. Make sure to measure it correctly and, remember, don’t overmix for the best results!
- ¼ teaspoon Salt: A little salt goes a long way to balance the sweetness and bring out all the delicious flavors.
For the Filling
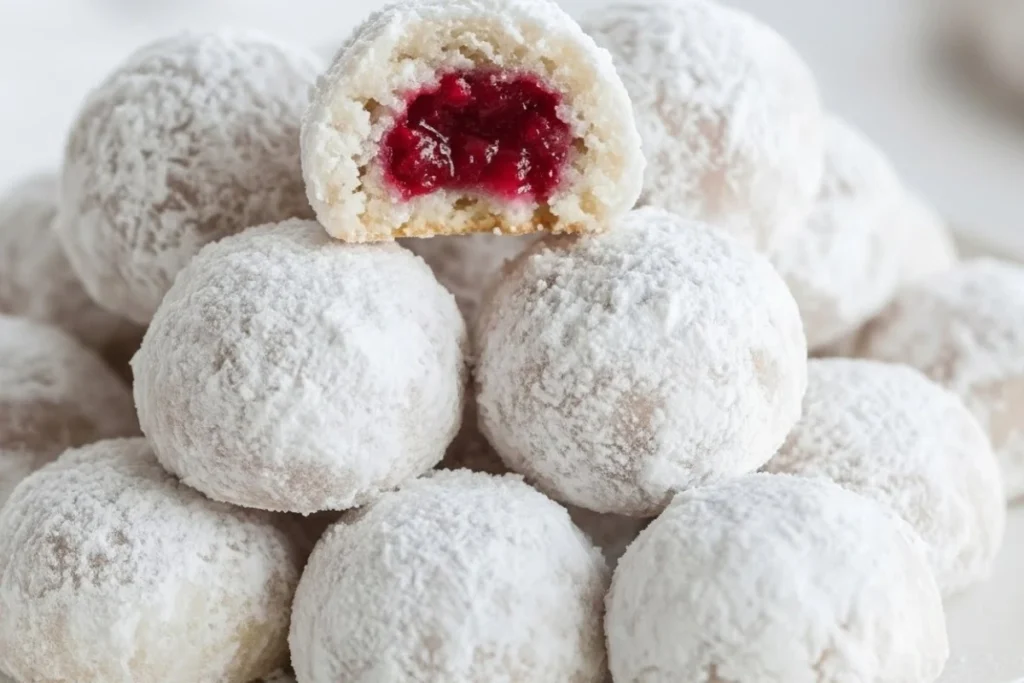
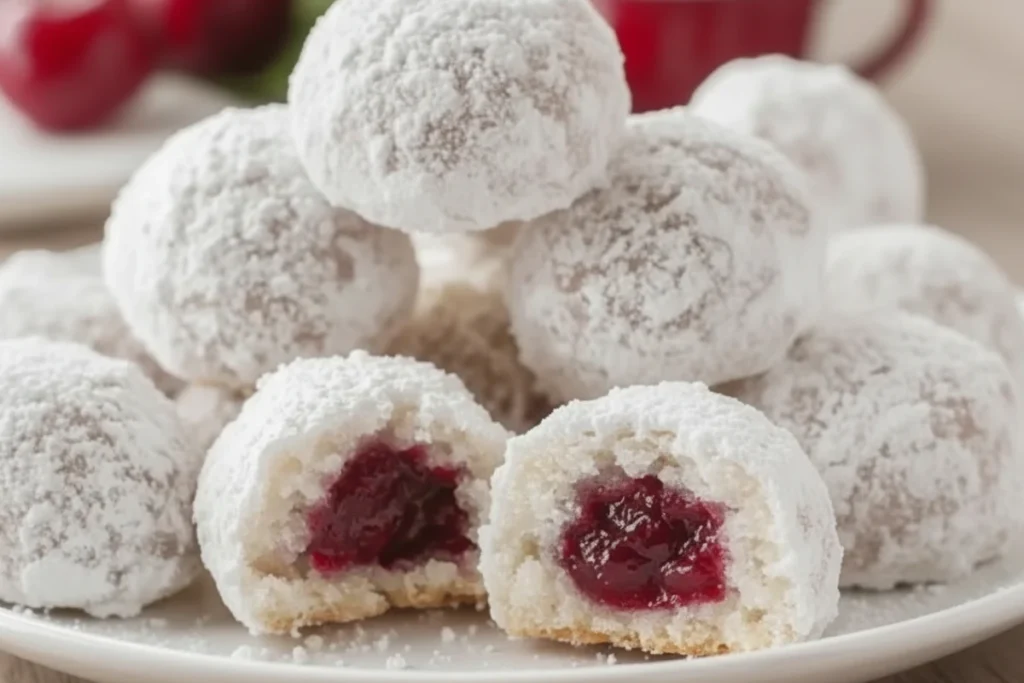
- ½ cup Cherry Preserves or Jam: Here’s the star of the show! This creates that delightful, gooey center. Pick a good quality cherry preserve for the best, most vibrant taste in your Cherry Snowball Cookies.
For the Coating
- 1 cup Powdered Sugar: This is for the finishing touch! We’ll roll the baked cookies in this twice to get that iconic snowy, sweet exterior.
Step-by-Step Guide: Crafting Your Cherry Snowball Cookies
Ready to bake? Follow these easy steps to create delightful Cherry Snowball Cookies that are as fun to make as they are to eat! We’ll go from mixing the dough to that beautiful snowy finish.
Preparing the Dough
- Cream Butter and Sugar: Grab a large mixing bowl and your electric mixer. Beat the softened unsalted butter and ¾ cup powdered sugar together on medium speed. Keep going until the mixture looks light, fluffy, and a pale yellow. This usually takes about 2 to 3 minutes, giving your cookies a perfect start.
- Add Vanilla: Scrape down the sides of the bowl with a spatula, making sure everything is well mixed. Then, add the pure vanilla extract and beat for another 30 seconds until it’s fully combined. This adds that lovely warm flavor to your Cherry Snowball Cookies.
- Combine Dry Ingredients: In a separate bowl, whisk together the all-purpose flour and salt. This makes sure the salt is evenly spread throughout the flour.
- Gradually Add Flour Mixture: Slowly add the flour mixture to your wet ingredients. Mix on low speed until the dough is just combined. It’s super important not to overmix here, as this can make your cookies tough instead of tender. The dough will look soft and a bit crumbly.
- Chill the Dough: Cover the bowl tightly with plastic wrap and pop the dough into the refrigerator for at least 30 minutes. This chill time is a secret weapon! It makes the dough much easier to handle and stops your Cherry Snowball Cookies from spreading too much when they bake. For another festive treat that brings a smile, try our classic Gingerbread Cookies recipe.
Forming and Filling Your Cherry Snowball Cookies
- Preheat Oven & Prep Pans: While your dough chills, preheat your oven to 350°F (175°C). Line two baking sheets with parchment paper or silicone baking mats. This stops your cookies from sticking.
- Scoop Dough: Take out about 1 tablespoon of the chilled dough. Gently flatten it in the palm of your hand to form a small disc.
- Add Cherry Filling: Place a tiny dollop (about ¼ teaspoon) of cherry preserves right in the center of your dough disc. Be careful not to use too much, or the delicious preserves might leak out during baking.
- Seal and Roll: Carefully bring the edges of the dough up and around the cherry filling. Pinch them tightly together to completely seal the preserves inside. Now, gently roll the dough in your hands to create a smooth, perfect ball. Repeat this process with all the remaining dough and filling. Place your formed Cherry Snowball Cookies about 1 inch apart on your prepared baking sheets.
Baking to Perfection
- Bake: Pop your baking sheets into the preheated oven. Bake the Cherry Snowball Cookies for 10 to 12 minutes. You’ll know they’re ready when the edges are lightly golden and the cookies look set. They won’t get deeply browned on top. Don’t overbake them; we want to keep that wonderful tender texture.
The Snowy Finish
- First Sugar Roll: Once the cookies are out of the oven, let them cool just enough so you can handle them, but still warm. Gently roll each cookie in a bowl filled with powdered sugar. The warmth helps that first layer of sugar stick beautifully.
- Cool and Second Sugar Roll: Transfer the sugared cookies to a wire rack and let them cool completely. Once they are fully cool, roll them in powdered sugar a second time. This creates that gorgeous, thick “snowy” coating that truly makes these look like classic Cherry Snowball Cookies! This double roll gives them their iconic, festive appearance.
Chef’s Secrets for Irresistible Cherry Snowball Cookies
Want to bake the absolute best Cherry Snowball Cookies every time? Here are some of my favorite tips and tricks that will help you achieve perfect results. These little secrets will make a big difference in your cookie baking!
- Room Temperature Butter is Key: Make sure your butter is truly softened before you start creaming it. It should be pliable, but not melted at all. This helps the butter trap air, which leads to a lighter, incredibly tender cookie texture that simply melts in your mouth.
- Don’t Overmix the Dough: Once you add the flour, mix the dough just until everything is combined. Overmixing can make the gluten in the flour develop too much, and that means tough cookies instead of crumbly, delicate Cherry Snowball Cookies. Be gentle!
- The Power of Chilling: Chilling the dough isn’t just to make it easier to handle; it’s vital for great cookies. Cold butter takes longer to melt in the oven, which stops your cookies from spreading too much. This way, your Cherry Snowball Cookies will keep their beautiful round shape.
- Quality Cherry Preserves Matter: The cherry filling is the delightful surprise inside, so choose wisely! A good quality cherry preserve with a vibrant flavor will truly elevate your Cherry Snowball Cookies. It makes that hidden burst of fruit even more delicious.
- Double the Roll, Double the Snow: For that iconic “snowy” look, roll your cookies in powdered sugar twice. First, when they are still warm, and then again once they’ve cooled completely. This gives them a beautiful, thick, and lasting coating that makes them truly look like classic Cherry Snowball Cookies.
Delicious Cherry Snowball Cookie Variations & Serving Suggestions
Part of the fun of baking is making a recipe your own! These Cherry Snowball Cookies are super adaptable. Here are some creative ideas to customize them, plus how to best enjoy every sweet bite.
- Nutty Additions: Want more texture and classic flavor? Stir in ½ cup of finely chopped pecans, walnuts, or slivered almonds when you add the flour to the dough. This creates a wonderful crunch and a more traditional snowball cookie feel.
- Alternative Fillings: While cherry preserves are amazing, don’t be afraid to experiment! Try raspberry, apricot, or even a tangy lemon curd for a different delightful surprise inside your snowball cookies. Each fruit brings its own unique taste.
- Citrus Zest Boost: For a bright, zesty twist, add 1 teaspoon of fresh orange or lemon zest to the dough when you mix in the vanilla extract. It really makes the flavors pop.
- Chocolate Cherry Snowballs: Love chocolate? Introduce 2 tablespoons of unsweetened cocoa powder along with the flour. This creates a rich, chocolatey dough that pairs perfectly with the sweet-tart cherry filling.
- Serving Suggestions: These beautiful Cherry Snowball Cookies are a natural fit for holiday dessert tables and cookie exchanges. They taste absolutely wonderful with a warm cup of coffee, tea, or rich hot cocoa. For a thoughtful gesture, pack them in decorative boxes to share as homemade gifts.
My Story: The Magic of Cherry Snowball Cookies
I still vividly remember my grandmother’s kitchen during the holidays – it was a true whirlwind of flour, sugar, and the most incredible, comforting aromas. She had such a special way with cookies, and while she baked many different kinds, her simple “snowballs” were always a standout favorite. There was just something so magical about those little powdered sugar treasures, sparkling like fresh snow!
As I got older and began my own baking adventures, I always loved taking classic recipes and adding my personal twist. For instance, I once experimented with creating Strawberry Cheesecake Truffle Balls to bring a different kind of sweet surprise. One particularly snowy afternoon, I was looking at a jar of vibrant cherry preserves, and a little lightbulb went off in my head. What if I could hide that bright burst of cherry goodness inside a classic snowball cookie? The very first batch of Cherry Snowball Cookies was a revelation!
The moment I tasted that sweet-tart cherry against the delicate, buttery dough, all wrapped up in a snowy blanket, it was pure bliss. Now, these Cherry Snowball Cookies have become a truly cherished tradition in my own home. They bring back that same warmth and joy I felt in my grandmother’s kitchen, always bringing people together around a plate of homemade happiness. Sharing these cookies, and seeing the surprise and delight on someone’s face when they discover that gooey cherry center, is honestly one of my greatest joys as a baker. It might be a simple cookie, but it carries so much love and so many sweet memories.
Storage & Make-Ahead Tips for Your Cherry Snowball Cookies
Want to enjoy your delicious Cherry Snowball Cookies for longer or get a head start on baking? These tips will help keep them fresh and ready for whenever you crave them! For more creative inspiration on Cherry Snowball Cookies and festive treats, you can always explore other wonderful baking sites.
- Storing Baked Cookies: Once your Cherry Snowball Cookies are completely cool, place them in an airtight container. They’ll stay fresh at room temperature for about 5-7 days. Lay sheets of parchment paper between layers to stop them from sticking and to keep that beautiful powdered sugar coating perfect.
- Freezing Baked Cookies: You can easily freeze baked Cherry Snowball Cookies! Let them cool all the way, then spread them in a single layer on a baking sheet to flash freeze for 1-2 hours until solid. After that, move them to a freezer-safe container or bag. They’ll keep for up to 2-3 months. Just thaw them at room temperature, and you can roll them in fresh powdered sugar if you like before serving.
- Make-Ahead Dough: Planning ahead is smart! You can prepare the cookie dough up to 2-3 days in advance. Just wrap it well and keep it in the refrigerator. You can also form the dough balls (without the cherry filling yet) and freeze them on a baking sheet, then transfer them to a freezer bag for up to 1 month. Thaw the dough slightly before you fill and bake your wonderful Cherry Snowball Cookies.
Frequently Asked Questions (FAQ) About Cherry Snowball Cookies
Baking is all about learning and confidence! Here are answers to some common questions you might have about making these delightful Cherry Snowball Cookies.
Do snowball cookies need to be refrigerated?
No, generally, your Cherry Snowball Cookies do not need to be kept in the fridge. The generous amounts of butter and sugar in them act as natural helpers to keep them fresh at room temperature. Just store them in an airtight container, away from direct sunlight, and they’ll be delicious for about 5-7 days. If your kitchen is super warm or humid, or if you ever use a fresh fruit filling (not preserves), then refrigeration might be a good idea. But for this recipe with cherry preserves, room temperature is perfect.
What makes snowball cookies crumbly?
That signature crumbly, melt-in-your-mouth texture of Cherry Snowball Cookies comes from a few special things. We use a good amount of butter in the dough, which makes them rich. Also, using powdered sugar instead of granulated sugar gives them a finer, more delicate crumb. Finally, they have less liquid, which helps create that tender cookie that practically dissolves when you take a bite. Just remember not to overmix the dough, or they might become tough instead of wonderfully crumbly!
How do you keep snowball cookies from flattening?
To make sure your Cherry Snowball Cookies stay perfectly round and don’t flatten out, a few things are key. First, ensure your butter is softened but definitely not melted, as melted butter causes spreading. Chilling the dough for at least 30 minutes before baking is super important; cold butter melts slower, helping the cookies hold their shape. Also, use parchment paper or silicone mats on your baking sheets instead of just grease. Lastly, check that your oven temperature is accurate and try not to open the oven door too often while they bake.
Can you freeze snowball cookies?
Yes, absolutely! You can freeze Cherry Snowball Cookies in both baked and unbaked forms. For baked cookies, let them cool completely, then place them in a single layer on a baking sheet to flash freeze until solid (about 1-2 hours). Then, transfer them to a freezer-safe airtight container or bag, where they’ll keep for up to 2-3 months. Just thaw them at room temperature before serving. For unbaked dough, you can form the balls with the cherry filling inside and freeze them solid. Bake them straight from frozen, adding a couple more minutes to the bake time, and then roll in powdered sugar once they’ve cooled a bit.
Conclusion: Enjoy Your Homemade Cherry Snowball Cookies!
Baking is truly about so much more than just making food; it’s about creating lasting memories, sharing love, and bringing warmth to everyone around you. These delightful Cherry Snowball Cookies are a perfect example of that feeling – they’re simple to make, yet incredibly delicious and wonderfully festive.
I sincerely hope you find as much joy in baking and sharing these little treasures as I do. So go forth, embrace the flour, and let the sweet aroma of your homemade Cherry Snowball Cookies fill your kitchen and your heart with happiness. If you’re looking for even more ideas or inspiration, take a peek at other fantastic Cherry Snowball Cookies recipes out there! Happy baking, my friends!
Print
Cherry Snowball Cookies
- Total Time: 1 hour 7 minutes
- Yield: 30 cookies
Description
Melt-in-your-mouth snowball cookies with a delightful cherry surprise inside, coated in a sweet, snowy finish. Perfect for any celebration!
Ingredients
- 1 cup (2 sticks) Unsalted Butter, softened
- ¾ cup Powdered Sugar
- 1 teaspoon Pure Vanilla Extract
- 2 cups All-Purpose Flour
- ¼ teaspoon Salt
- ½ cup Cherry Preserves or Jam
- 1 cup Powdered Sugar (for coating)
Instructions
1. Cream Butter and Sugar: In a large mixing bowl, beat the softened unsalted butter and ¾ cup powdered sugar together with an electric mixer on medium speed until the mixture is light, fluffy, and pale yellow (about 2-3 minutes).
2. Add Vanilla: Scrape down the sides of the bowl, then add the pure vanilla extract and beat for another 30 seconds until fully incorporated.
3. Combine Dry Ingredients: In a separate bowl, whisk together the all-purpose flour and salt.
4. Gradually Add Flour Mixture: Slowly add the flour mixture to the wet ingredients, mixing on low speed until just combined. Be careful not to overmix.
5. Chill the Dough: Cover the bowl with plastic wrap and chill the dough in the refrigerator for at least 30 minutes.
6. Preheat Oven & Prep Pans: While the dough chills, preheat your oven to 350°F (175°C). Line two baking sheets with parchment paper or silicone baking mats.
7. Scoop Dough: Take about 1 tablespoon of chilled dough and flatten it slightly in the palm of your hand to form a disc.
8. Add Cherry Filling: Place a small dollop (about ¼ teaspoon) of cherry preserves in the center of the dough disc.
9. Seal and Roll: Carefully bring the edges of the dough up and around the cherry filling, pinching them together to completely seal the preserves inside. Gently roll the dough in your hands to form a smooth ball. Repeat with remaining dough and filling, placing cookies about 1 inch apart on prepared baking sheets.
10. Bake: Bake the Cherry Snowball Cookies for 10-12 minutes, or until the edges are lightly golden and the cookies are set.
11. First Sugar Roll: While the cookies are still warm (but cool enough to handle), gently roll each one in a bowl of powdered sugar.
12. Cool and Second Sugar Roll: Let the cookies cool completely on a wire rack. Once fully cooled, roll them in powdered sugar a second time.
Notes
To achieve a perfect tender texture, ensure butter is softened but not melted and avoid overmixing the dough. Chilling the dough helps maintain its shape. Double rolling in powdered sugar creates the iconic snowy finish.
- Prep Time: 55 minutes
- Cook Time: 12 minutes
- Category: Dessert
- Method: Baking
- Cuisine: American