Introduction: Why You’ll Love This German Bread
Hello, fellow bakers! There’s something truly special about the smell of freshly baked bread filling your home, isn’t there? For me, it’s a feeling of comfort and joy that takes me right back to my grandma’s kitchen. Today, we’re diving into the wonderful world of baking crispy, chewy, and utterly delightful German bread rolls, known as Brötchen.
These aren’t just any rolls; they’re a beloved staple in Germany, perfect for breakfast, lunch, or as a warm, comforting side to any meal. This recipe for these authentic rolls is simple enough for even beginner bakers. Yet, it yields results that will impress even the most seasoned bakers. We’ll turn everyday ingredients into magic, creating a genuine taste of Germany right in your kitchen.
Get ready to experience the pure joy of crafting homemade bread that will bring smiles to everyone around your table. This classic German bread recipe is about to become your new favorite! The satisfaction of baking your own bread is unmatched, creating memorable moments.
Table of Contents
Table of Contents
What You’ll Need: Ingredients for Amazing German Bread Rolls
Alright, bakers, it’s time to gather everything we need for our amazing German bread rolls! Having all your ingredients ready makes the baking process smooth and fun. Using precise measurements is super important for this authentic bread recipe to ensure perfect results every time. Let’s make some delicious rolls!
- 500 g (1.1 lbs / 4 ¼ cups) Bread flour, plus extra for dusting (SEE NOTES)
- 340 ml (11.2 fl.oz / 1 1/3 cups) Water, lukewarm
- 2 ½ teaspoons Dry yeast (7 g / ¼ oz)
- 1 teaspoon Sugar
- 1 teaspoon Salt
- 1 tablespoon Vegetable oil, plus extra for greasing
Baking Bliss: Step-by-Step German Bread Rolls
Let’s get our hands doughy and bake some incredible bread rolls! Follow these steps carefully for the best results and you’ll be enjoying fresh, homemade German bread in no time. This journey to perfect bread is easier than you think.
Step 1: Activate the Yeast
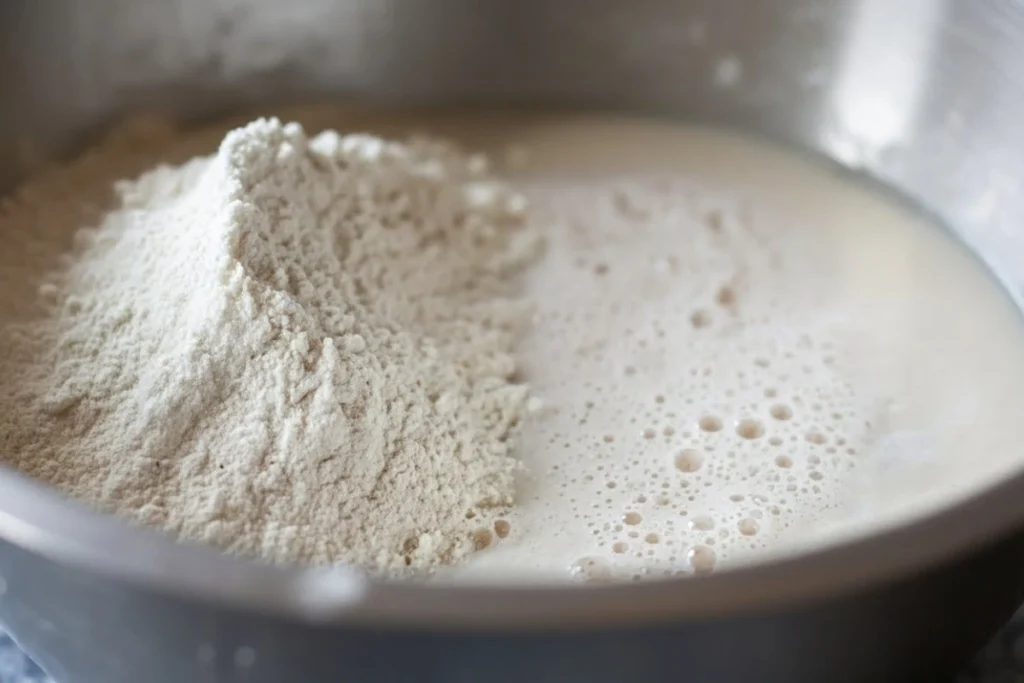
First, grab your large mixing bowl or the bowl of your stand mixer. Pour in the lukewarm water and sugar. Sprinkle the dry yeast evenly over the top. Now, let it sit quietly for about 5-10 minutes. You’ll know your yeast is happy and ready when it gets nice and foamy and bubbly, showing that it’s alive and ready to help your rolls rise beautifully. This crucial step ensures light and airy results.
Step 2: Mix the Dough
Next, add the bread flour, salt, and vegetable oil to the bubbly yeast mixture. If you’re using a stand mixer with a dough hook, mix on low speed for 8-10 minutes. The dough will come together, becoming smooth and elastic. If you’re kneading by hand, turn the dough out onto a lightly floured surface and knead for 10-12 minutes. You want it to feel smooth and spring back gently when you poke it. This kneading process is vital for developing the gluten structure, giving these rolls their signature chew and wonderful texture.
Step 3: First Rise (Bulk Fermentation)
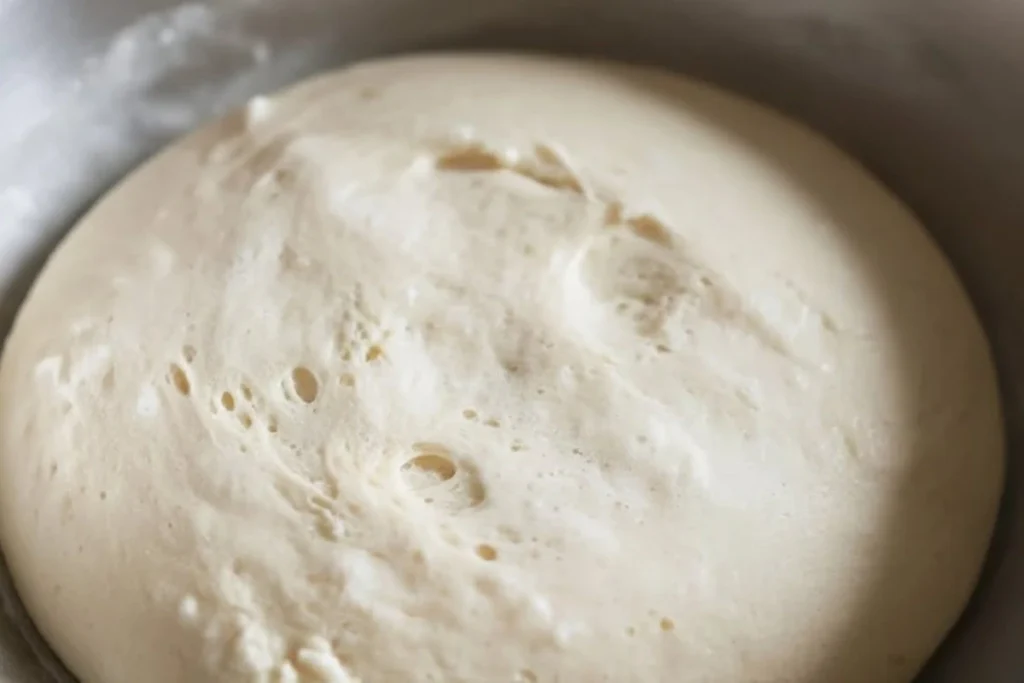
Lightly grease a clean bowl with a little extra vegetable oil. Place your kneaded dough into the bowl, turning it over once to coat all sides. Cover the bowl with plastic wrap or a damp kitchen towel. Let it rise in a warm spot for 1 to 1 ½ hours, or until it has clearly doubled in size. This initial rise is where much of the amazing flavor develops in this bread, making it truly special. For another incredibly easy and flavorful bread, you might enjoy trying a peasant-style no-knead bread recipe.
Step 4: Shape the Rolls
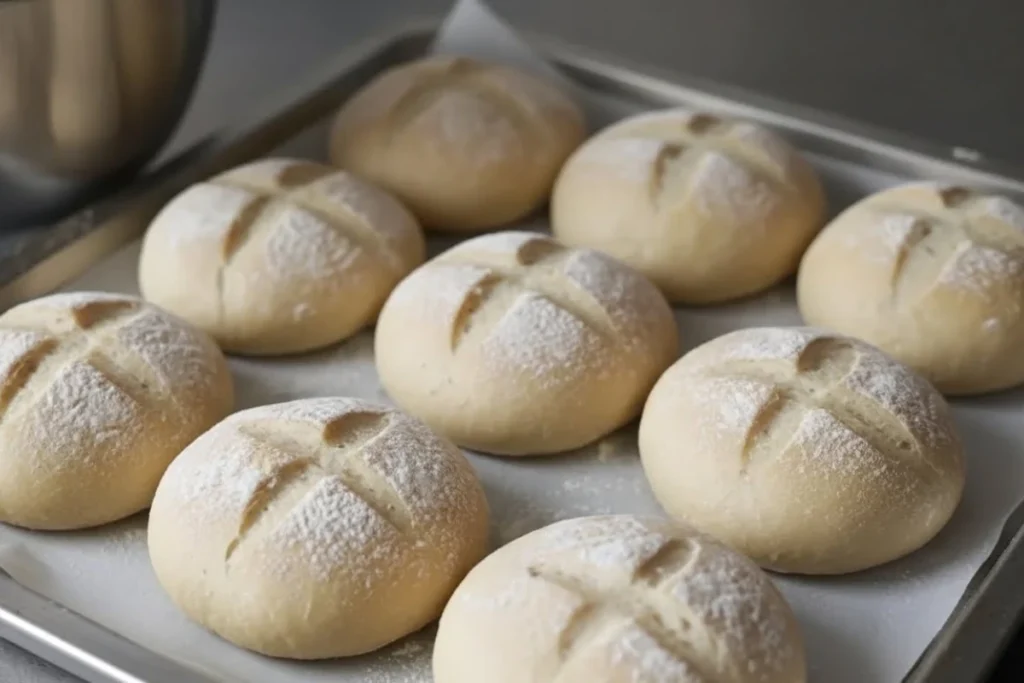
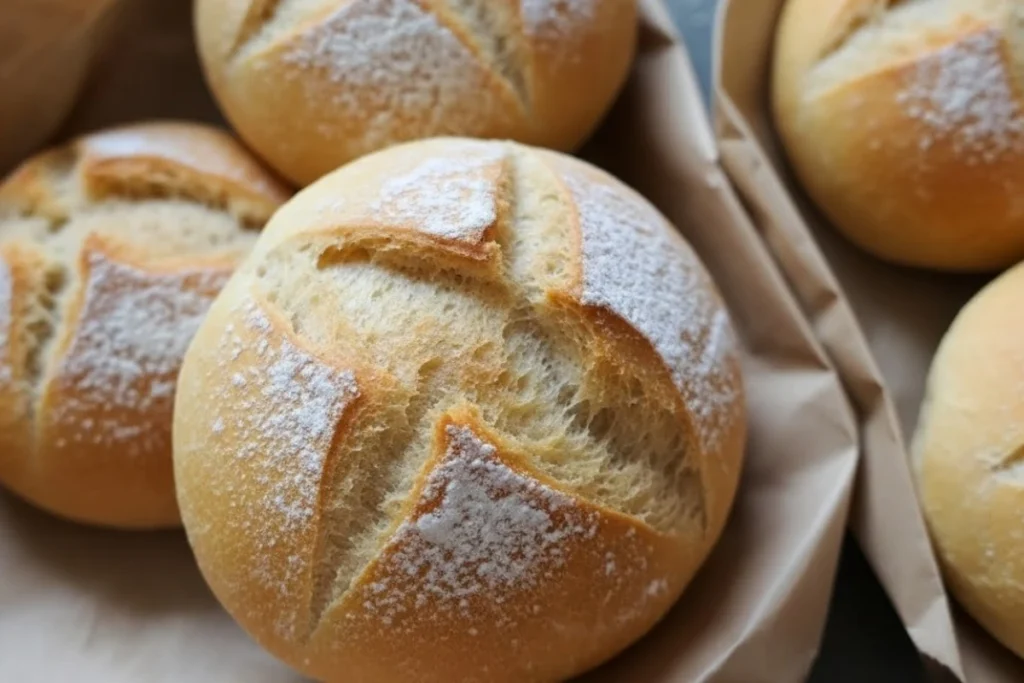
Once your dough has risen, gently punch it down to release the air. Turn it out onto a lightly floured surface. Now, divide the dough into 8-10 equal pieces. The size depends on how large you want your rolls to be. Shape each piece into a tight, round ball. To do this, cup your hand over the dough piece and roll it against the counter with a gentle, circular motion. This creates perfectly shaped rolls.
Step 5: Second Rise (Proofing)
Place the shaped rolls on a baking sheet lined with parchment paper, making sure to leave some space between them. Lightly dust the tops with a little extra flour. Cover them loosely with plastic wrap or a damp towel and let them rise again for 30-45 minutes. They should look puffy and slightly larger. While they proof, preheat your oven to a hot 220°C (425°F). For a super crispy crust on your rolls, place an empty oven-safe pan on the bottom rack of your oven while it preheats.
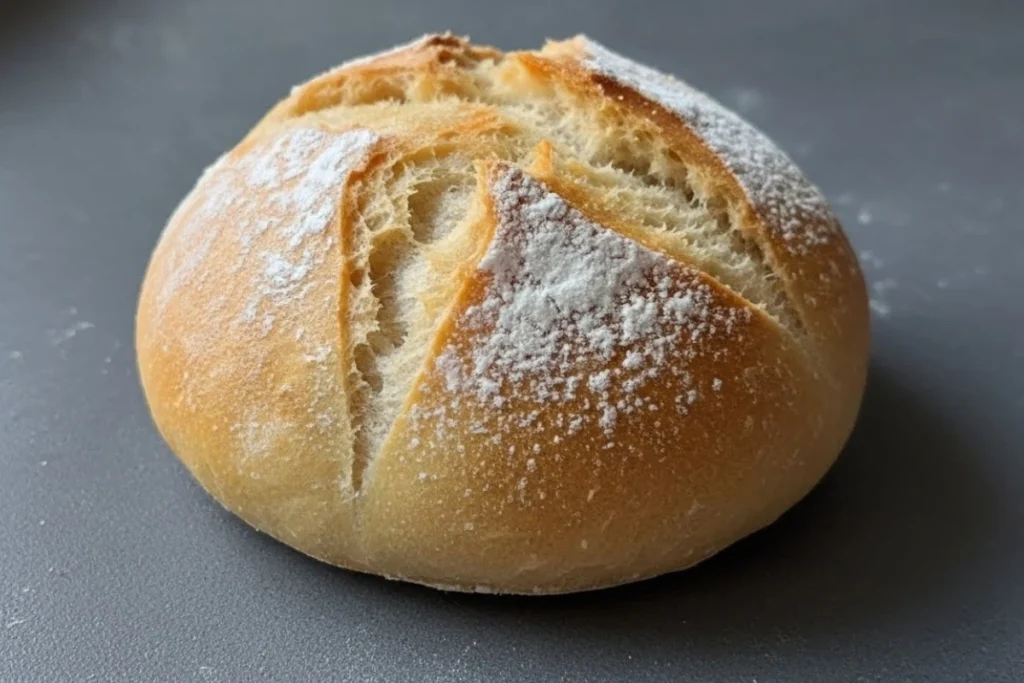
Step 6: Score and Bake
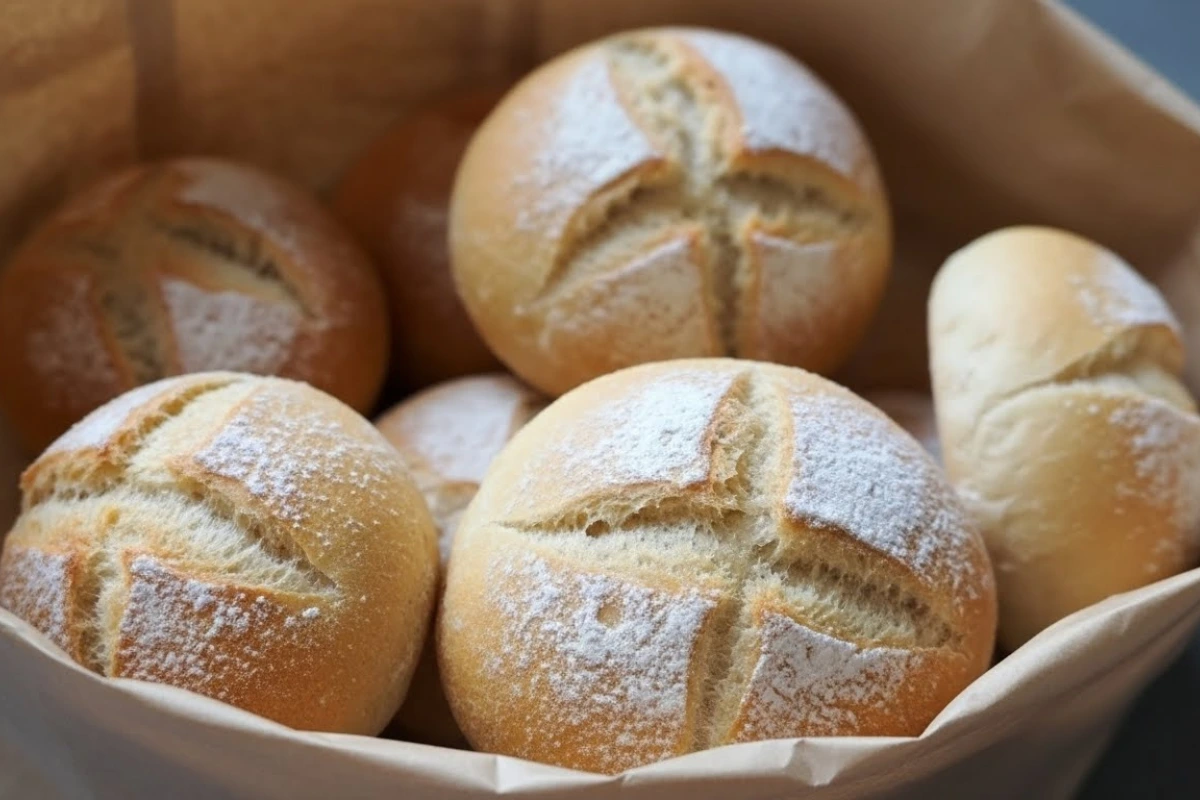
When your oven is hot and the rolls have proofed beautifully, carefully remove their cover. Grab a sharp knife or a bread lame and make a cross or a single slit on the top of each roll. This scoring helps the rolls expand nicely without tearing unevenly. Now, carefully pour ½ cup of hot water into the empty pan you placed in the oven to create steam. Quickly slide the baking sheet with your rolls into the oven. Bake them for 18-22 minutes, or until they’re golden brown and sound hollow when tapped on the bottom. The steam helps create that characteristic crispy crust on your German bread.
Step 7: Cool and Enjoy
Once baked to perfection, transfer your golden rolls to a wire rack to cool completely. While it’s incredibly tempting to dive right in, letting them cool allows the internal structure to set properly. This step results in the very best texture for your homemade bread. Then, slice them open, spread with butter, and savor this fantastic homemade bread. You’ve done it!
Chef’s Secrets for Perfect German Bread Rolls
Achieving perfect German bread is all about understanding a few key tricks. First, always make sure your yeast is active. Lukewarm water, around 105-115°F (40-46°C), is just right—too hot will kill the yeast, and too cold won’t get it going. If your yeast doesn’t foam up, it’s best to start with a fresh batch for your rolls.
Don’t skip the kneading process either; it’s super important for developing the gluten. This is what gives these rolls their wonderful structure and satisfying chew. A well-kneaded dough for these rolls will feel smooth and elastic.
Another big secret for that iconic crispy crust on your rolls is using steam during baking. Adding a pan of hot water to the bottom of your oven creates a steamy environment. This helps the crust develop beautifully before it hardens, making your homemade bread truly authentic. You can even spritz the oven walls with water a few times during the first 10 minutes of baking. Mastering these simple secrets will help you make exceptional German bread every single time! If you’re exploring different baking techniques or dietary needs, you might also be interested in a gluten-free sourdough bread recipe for another rewarding baking project.
Recipe Variations for Your German Bread Adventure
Once you’ve mastered the basic German bread roll, your baking journey really opens up! There are so many fun variations to try with your homemade rolls. For a delicious savory twist, mix in 1-2 tablespoons of dried herbs, like rosemary or thyme, with the flour. You could also add 1/4 cup of grated Parmesan cheese for cheesy rolls.
Want fantastic texture? Before the second rise, brush your shaped rolls with water or an egg wash. Then, generously sprinkle them with sesame seeds, poppy seeds, or a mix. This creates a wonderful seed-crusted bread that looks and tastes amazing.
For a different flavor, swap out a quarter of the bread flour for rye flour. This gives your rolls a slightly denser texture and a distinct, earthy, and mildly sour taste, typical of many traditional German bread styles. Experiment and find your favorite roll creation!
My Own German Bread Story
My passion for baking, especially for German bread, goes back as far as I can remember. I must have been about five years old, barely tall enough to see over the kitchen counter, when I first watched my Oma (grandmother) bake Brötchen. Her kitchen was always filled with the comforting aroma of yeast and flour, a smell that still instantly transports me back.
I remember her strong, flour-dusted hands deftly kneading the dough. Her laughter would fill the room as I tried to imitate her, mostly just making a sticky mess. She’d always give me a small piece of dough to play with, which I’d proudly shape into “mini-Brötchen.” She’d bake these tiny bread creations right alongside hers.
Those warm, crispy rolls, fresh from the oven, slathered with butter and homemade jam, were the taste of pure happiness. It wasn’t just about the food; it was about the ritual, the shared moments, and the love poured into every single batch. That early introduction to the magic of baking, particularly to this humble German bread, sparked a lifelong journey for me.
Even now, when I bake these rolls, I feel a deep connection to her. That feeling of bringing people together with simple, delicious food is truly special. It’s more than just a recipe; it’s a piece of my heart and a legacy I love to share with fellow bakers.
Frequently Asked Questions (FAQ)
What is German bread called?
Germany boasts an incredible variety of breads! The term “German bread” is quite broad. Daily rolls, like the ones we’re making today, are most commonly called Brötchen. Depending on where you are in Germany, you might also hear them called Semmel or Weckle.
Beyond these rolls, popular types of bread include Roggenbrot (rye bread), Vollkornbrot (whole grain bread), and the dark, dense Pumpernickel. There’s also Mischbrot, a mixed grain bread made from rye and wheat. Each distinct German bread has its own unique character and taste, making Germany a true paradise for bread lovers! If you’re keen to explore more traditional loaves, learn how to make an authentic German Bauernbrot.
What is the most popular German bread?
While it’s tough to pick just one “most popular” German bread that everyone agrees on, Brötchen (German bread rolls) are undeniably a daily staple across the country. People enjoy these wonderful rolls for breakfast, as part of a packed lunch, or alongside dinner.
For larger loaves, Mischbrot, a mixed rye and wheat bread, is incredibly common and beloved across Germany. It’s a fantastic example of versatile bread cherished for its balanced flavor and texture.
Is Brötchen healthy?
Brötchen can certainly be a healthy part of a balanced diet, especially when you make them yourself with quality ingredients. Our recipe uses basic bread flour, which provides good carbohydrates for energy. You can even boost their nutritional value by using some whole wheat flour for part of the recipe, adding more fiber and important nutrients.
Compared to highly processed snacks, homemade rolls are a great choice. You control exactly what goes into your fresh homemade bread, avoiding unnecessary additives.
What is Germany’s favorite bread?
Similar to asking for the “most popular,” Germany’s “favorite” German bread can truly vary by personal preference and region! However, the tradition of baking diverse, hearty breads is deeply ingrained in German culture.
Beyond Brötchen, you’ll find immense love for Vollkornbrot (whole grain bread) and Roggenbrot (rye bread). They are cherished for their robust flavor, nutritional value, and how well they stay fresh. For a deeper dive into whole grain baking, consider trying a traditional German Vollkornbrot recipe. The rich tradition of German baking truly means there isn’t just one single favorite!
Conclusion: Your Journey to Delicious German Bread Begins!
And there you have it – your very own batch of homemade German bread rolls! I truly hope you’ve enjoyed this baking adventure as much as I loved sharing it with you. There’s nothing quite like the feeling of pulling warm, fragrant bread from your own oven, especially when you’ve crafted it yourself.
These delightful Brötchen are perfect for everyday enjoyment. Whether you slather them with butter, pile them high with cold cuts, or simply dip them in a hearty soup, they are sure to please. Baking is such a wonderful way to connect with tradition and create new, delicious memories.
So go ahead, share your amazing rolls with loved ones. Let its comforting aroma fill your home and hearts. Happy baking, fellow baking enthusiast!
Print
German Bread
- Total Time: 3 hrs 02 minutes
- Yield: 8-10 rolls
Description
Crispy, chewy German bread rolls (Brötchen) are a beloved staple! This simple recipe guides you to bake authentic homemade bread, perfect for any meal.
Ingredients
- 500 g Bread flour
- 340 ml Water, lukewarm
- 2 ½ teaspoons Dry yeast (7 g)
- 1 teaspoon Sugar
- 1 teaspoon Salt
- 1 tablespoon Vegetable oil
- ½ cup Hot water (for steam)
Instructions
1. In a large mixing bowl (or stand mixer bowl), combine lukewarm water and sugar. Sprinkle dry yeast over the top and let it sit for about 5-10 minutes until foamy and bubbly.
2. Add bread flour, salt, and vegetable oil to the yeast mixture. If using a stand mixer with a dough hook, mix on low speed for 8-10 minutes until smooth and elastic. If kneading by hand, turn dough onto a lightly floured surface and knead for 10-12 minutes until smooth and springs back when poked.
3. Lightly grease a clean bowl with vegetable oil. Place the dough in the bowl, turning once to coat. Cover with plastic wrap or a damp kitchen towel. Let it rise in a warm place for 1 to 1 ½ hours, or until doubled in size.
4. Gently punch down the risen dough to release air. Turn it out onto a lightly floured surface. Divide dough into 8-10 equal pieces. Shape each piece into a tight, round ball by cupping your hand over the dough and rolling it against the counter with a gentle, circular motion.
5. Place shaped rolls on a baking sheet lined with parchment paper, leaving space between them. Lightly dust tops with extra flour. Cover loosely and let rise again for 30-45 minutes, or until puffy and slightly larger. Preheat oven to 220°C (425°F) during this time. For a crispy crust, place an empty oven-safe pan on the bottom rack while preheating.
6. Once oven is preheated and rolls have proofed, remove cover. Using a sharp knife or bread lame, make a cross or single slit on top of each roll. Carefully pour ½ cup of hot water into the empty pan in the oven to create steam. Quickly place the baking sheet with rolls into the oven. Bake for 18-22 minutes, or until golden brown and sound hollow when tapped on the bottom.
7. Transfer baked rolls to a wire rack to cool completely. Slice them open, spread with butter, and savor.
Notes
Ensure yeast is active with lukewarm water (105-115°F / 40-46°C). Do not skip kneading for gluten development. Use steam during baking for a crispy crust. Variations include adding dried herbs (rosemary, thyme), grated Parmesan cheese, or a seed crust (sesame, poppy). Substituting a quarter of bread flour with rye flour will yield a denser, slightly sour taste.
- Prep Time: 2 hrs
- Cook Time: 18-22 minutes
- Category: Bread
- Method: Baking
- Cuisine: German